18 June 2009

Menambahkan fitur menu develop pada safari windows dan mac

Safari adalah web browser dari Apple yang dikembangkan dari open source Webkit. Safari hingga tulisan ini dibuat telah mencapai versi 4. Dan browser safari ini tersedia di 2 OS yaitu Mac dan Windows.

Salah satu fitur yang mungkin jarang diketahui oleh para pengguna browser ini adalah adanya fitur menu “develop” yang berisi pilihan2 aneh (:P). Mungkin bagi sebagian orang menambahkan fitur ini akan memperlambat kinerja browser ini tapi bagi developer web, fitur ini menjadi sangat penting keberadaannya.

Oleh karena itu artikel kali ini akan membahas bagaimana cara menambahkan fitur menu develop pada safari agar dapat beroperasi seperti firebug pada firefox.

Untuk menampilkan fitur develop ini :

1. Pengguna Mac.

Apapun versi Safarinya, lewat command line, buka terminal window dan tulis perintah ini
defaults write com.apple.Safari WebKitDeveloperExtras -bool true
defaults write com.apple.Safari IncludeDebugMenu 1

2. Pengguna Windows

Untuk Safari 3.x
Masuk kedirektori dibawah ini sesuai OS anda :

Windows XP
C:\Documents and Settings\USERNAME\Application Data
\Apple Computer\Safari\Preferences.plist
Windows Vista
C:\Users\USERNAME\AppData\Roaming\Apple Computer
\Safari\Preferences.plist
Untuk Safari 4.x
Masuk kedirektori ini
C:\Program Files\Safari\Safari.resources\defaults.plist

Tambahkan perintah yang dicetak tebal pada file yang sesuai dengan versi Safari atau Windows anda.

<dict>
.....
<key>IncludeDebugMenu</key>
<true/>
</dict>

Restart Safari anda dan lihat hasilnya.

menu develop pada safari windows
menu develop pada safari mac
inspect elemen pada safari
waktu eksekusi resource web

Cara singkat :

Heheh, tp saya punya cara yang singkat tanpa perlu restart Safari. Masuk Preferences Safari kamu, lalau pilih tab Advanced. Centangkan pilihan Show Develop menu in menu bar. Close window Preferences dan lihat hasilnya di menu bar akan sama hasilnya dengan cara2 susah diatas.

menu preferences tab advanced safari


10 June 2009

Membuat GWT Project pada IDE Eclipse

Google Web Toolkit (GWT) adalah framework open source yang dapat membantu kita dalam membuat Rich Internet Application (RIA) dengan menggunakan bahasa pemograman Java. Bagian terpenting dalam membuat RIA itu adalah Javascript, nah disini GWT akan membantu kita menerjemahkan kode Java kedalam Javascript. Tetapi bukan berarti dengan menggunakan GWT ini kita tidak diizinkan untuk membuat web dengan Javascript. Kita bahkan dapat memasukkan kode Javascript untuk berinteraksi dengan GWT. Bisa memasukkan jQuery, Dojo, dll.

Saya akan membagi tutorial ini menjadi 4 bagian

1. Menginstall GWT
2. Membuat Project GWT dengan utility scripts bawaan GWT
3. Import Project GWT ke IDE Eclipse
4. Menjalankan Project GWT

Menginstall GWT
Untuk menggunakan GWT ini, terlebih dahulu kita harus mendownload java2sdk dari sun. Untuk menginstall java2sdk ke windows atau linux silahkan lihat disini. Mendownload GWT dari http://code.google.com/webtoolkit. Saat tulisan ini dibuat GWT telah mencapai versi 1.6.4. Jika sudah mendownload GWT versi terbaru silahkan ekstrak ke direktori mana saja anda suka. Tetapi kali ini saya memilih di drive C:\

GWT directory

  • gwt-servlet.jar dan gwt-user.jar adalah library yang mengandung GWT API. Kedua file ini dibutuhkan selama proses development dan runtime.

  • gwt-dev-windows.jar adalah library yang spesifik bergantung pada OS yang dipakai. Librari ini mengandung GWT compiler dan file dll yang berhubungan pada saat mode Hosted. Untuk linux dan mac adalah gwt-dev-linux.jar dan gwt-dev-mac.jar.
  • applicationCreator.cmd, benchmarkViewer.cmd, i18nCreator.cmd, junitCreator.cmd, dan projectCreator.cmd adalah comman line scripts atau batch yang akan membantu kita membuat aplikasi GWT. File-file ini selanjutnya saya sebut utility scripts.
  • Direktori doc mengandung Javadoc untuk library GWT dan direktori samples mengandung contoh-contoh

Membuat Project GWT dengan utility scripts bawaan GWT
Saya tidak akan menjelaskan file-file didalam folder GWT lebih mendalam lagi karena sayapun masih pemula. Hehe. Ok. Kita langsung saja membuat aplikasi hello world sebagai awal. Disini saya akan membuat project GWT dengan nama myWeb yang berbasis IDE eclipse untuk IDE Netbeans liat disini. Gunakan projectCreator.cmd. masuk ke command prompt GWT ketikkan projectCreator.cmd -eclipse myWeb -out myWeb. Akan tampil :

cmd GWT project   creator

Nah kemudian dengan applicationCreator.cmd.
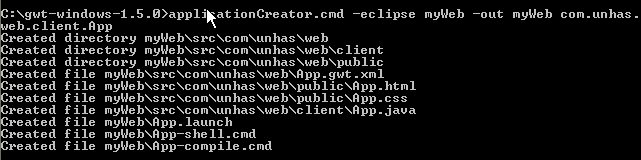
Ketikkan applicationCreator.cmd -eclipse myWeb -out myWeb com.unhas. web.client.App. Akan tampil :

GWT   application creator

Import Project GWT ke IDE Eclipse
Klik kanan pada jendela project di Eclipse. Klik kanan ditempat yang kosong maksud saya.

Eclipse import GWT   project

Trus pilih import…, maka akan muncul jendela dibawah ini :

Eclipse   import existing project

Pilih “Existing Projects into Workspace”. Kemudian klik tombol Next akan muncul jendela :

Eclipse   Select existing GWT project

Klik tombol browse dan cari folder myWeb di folder ekstrak . Kemudian klik Finish. Dan project tadi akan di import ke IDE Eclipse kita yang hasilnya adalah sebagai berikut :

Eclipse GWT   project
Umumnya pada setiap project GWT terdapat 2 buah folder yaitu client dan public. Seperti yang anda liat file dgn ekstensi .java selalu berada pada folder client dan file HTML ada pada folder public. Ini berarti kita dapat menambahkan file JSP, image, video, dll ke folder public.

Running GWT Project
Klik kanan pada file App.launch

Eclipse run as GWT project

Pilih Run As > App. Dan akan tampil 2 jendela sbb :

GWT Development Shell

Inilah hasilnya dalam Hosted Mode. Jika ingin dalam Web Mode klik Compile/Browse:
GWT default example

Loh kok tampilannya bisa begitu, itu karena generated code yang dihasilkan dengan utility scripts pada bawaan GWT. Anda dapat merubahnya pada file App.java yang mengimplementasikan EntryPoint pada onLoadModule().

Cara menginstall Java SDK di Windows langkah demi langkah

Tutorial ini diperuntukkan bagi orang-orang yang amat sangat terlalu awam bagi dunia java (heheh…). Tutorial ini akan saya bagi menjadi 3 bagian, yaitu :

1. Menginstall Java SDK
2. Mengantur Environment Variables Windows
3. Mengcompile dan menjalankan program dengan Java

Menginstall Java SDK
Downloadlah terlebih dahulu Java SDK terbaru disini. Kali ini saya mempunyai Java SDK 6 Update 12.
Klik 2x program yang telah anda download tadi, sambil menunggu beberapa saat sampai muncul :


Kemudian kita akan dibawa ke window dibawah ini :


Klik tombol Accept dan kita akan dibawa ke window Custom Setup :


Terdapat 4 pilihan :

  1. Development Tools, ini berisi tentang tools untuk membuat program java. Seperti compile, debug, dll.
  2. Demos and Samples, ini berisi tentang demo dan sampel program dalam bahasa Java. Dan ini baik untuk dipelajari sorang pemula.
  3. Source Code, ini berisi tentang source code java dari demo dan sampel.
  4. Java DB, ini berisi tentang tools untuk berhubungan dengan engine database.

Kali ini saya akan menginstall semuanya kemudian klik tombol Next. Tunggu sampai proses menginstall selesai.


Klik tombol finish sebagai tanda proses instalasi telah selesai.

Coba pindah ke direktori C:\Program Files\Java, maka anda akan mendapatkan struktur direktori seperti dibawah ini :


Mengantur Environment Variables Windows
Selanjutnya kita akan mengatur lingkungan variabel windows. Pertama adalah lingkungan java runtime dan kedua adalah lingkungan JDK. Untuk memastikan apakah java runtime telah terinstal dengan baik, masuk ke sembarang direktori dengan cmd seperti dibawah ini :


Terlihat ada respon, ini berarti java runtime telah terinstall dengan baik. Bagaimana dengan JDKnya, masuk ke sembarang direktori dengan cmd seperti dibawah ini :


Terlihat bahwa javac sebagai compiler java tidak dikenali di lingkungan windows. Segera masuk ke System Properties Windows dengan mengklik-kanan icon My Computer lalu pilih Properties.


Pilih Environment Variables, Kemudian akan muncul jendela :


Pilih tombol New, bahwa kita akan membuat system variable baru. Liat alamat direktori jdk anda, lalu masukkan di Variable value seperti dibawah ini :


Pilih OK.


Pilih Edit.


Tambahkan %JAVA_HOME%\bin di Variable value. Ingat jangan menghapus nilai sebelumnya, kita Cuma menambahkan setelah karakter ;. Lalu pilih OK. Dan pilih OK lagi di jendela Environment Variables.


Untuk memastikan apakah settingan kita berjalan dengan baik. Buka jendela cmd yang baru, lalu ketikkan javac.


Ada respon. Berita baik, berarti settingan kita berjalan dengan baik.

Mengcompile dan menjalankan program dengan Java
Buat file baru dengan nama coba.java.
Lalu masukkan skrip dibawah ini :

public class coba{
public static void main(String args[]){
System.out.println("oiiii java ..... i'm coming");
}
}

Compile file coba.java dengan perintah javac coba.java. Jika ada error liat kembali skrip anda dan perintah compilenya. Berhasil tidaknya ditandai dengan tidak adanya respon dari compiler java.

Jalankan dengan coba.java dengan perintah java coba
Untuk lebih mudah silahkan lihat gambar dibawah ini :

27 March 2009

Most used css tricks

Earlier before I have written an article about current best CSS hacks which you can see here And now here's the list of today's most used CSS tricks and tips. I have added image examples for most of them because of critics on CSS hacks article. If you think I have missed any please let me know

1. Rounded corners without images
<div id="container">
<b class="rtop">

<b class="r1"></b> <b class="r2"></b> <b class="r3"></b>
<b class="r4"></b>
</b>

<!--content goes here -->
<b class="rbottom">
<b class="r4"></b> <b class="r3"></b> <b class="r2"></b>
<b class="r1"></b>

</b>
</div>

.rtop, .rbottom{display:block}
.rtop *, .rbottom *{display: block; height: 1px; overflow: hidden}

.r1{margin: 0 5px}
.r2{margin: 0 3px}

.r3{margin: 0 2px}
.r4{margin: 0 1px; height: 2px}

Rounded corners without images

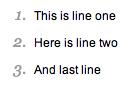
2. Style your order list
<ol>
<li>

This is line one
</li>
<li>

Here is line two

</li>
<li>

And last line
</li>
</ol>

ol {
font: italic 1em Georgia, Times, serif;

color: #999999;
}

ol p {
font: normal .8em Arial, Helvetica, sans-serif;

color: #000000;
}

Style your order list

3. Tableless forms
<form>
<label for="name">Name</label>
<input id="name" name="name"><br>
<label for="address">Address</label>
<input id="address" name="address"><br>

<label for="city">City</label>
<input id="city" name="city"><br>
</form>

label,input {

display: block;
width: 150px;
float: left;
margin-bottom: 10px;

}

label {
text-align: right;
width: 75px;
padding-right: 20px;

}

br { clear: left; }

CSS Tableless forms

4. Double blockquote
blockquote:first-letter {
background: url(images/open-quote.gif) no-repeat left top;
padding-left: 18px;
font: italic 1.4em Georgia, "Times New Roman", Times, serif;
}

Double blockquote

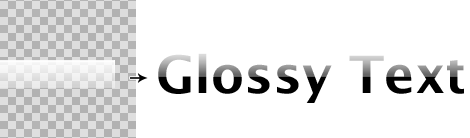
5. Gradient text effect
<h1><span></span>CSS Gradient Text</h1>

h1 {

font: bold 330%/100% "Lucida Grande";
position: relative;
color: #464646;

}
h1 span {
background: url(gradient.png) repeat-x;
position: absolute;
display: block;
width: 100%;
height: 31px;

}

<!--[if lt IE 7]>
<style>
h1 span {
background: none;
filter: progid:DXImageTransform.Microsoft.AlphaImageLoader
(src='gradient.png', sizingMethod='scale');

}
</style>

<![endif]-->

Gradient text effect

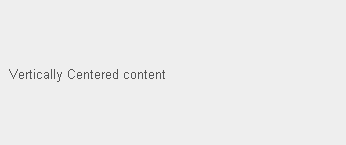
6. Vertical centering with line-height
div{

height:100px;
}
div *{
margin:0;
}

div p{
line-height:100px;
}

Content here

Vertical centering with line-height

7. Rounded corners with images
<div class="roundcont">
<div class="roundtop">
<img src="tl.gif" alt=""
width="15" height="15" class="corner"

style="display: none" />
</div>

CONTENT
<div class="roundbottom">
<img src="bl.gif" alt=""

width="15" height="15" class="corner"
style="display: none" />
</div>

</div>

.roundcont {
width: 250px;
background-color: #f90;
color: #fff;

}
.roundcont p {
margin: 0 10px;
}
.roundtop {

background: url(tr.gif) no-repeat top right;
}
.roundbottom {

background: url(br.gif) no-repeat top right;
}
img.corner {

width: 15px;
height: 15px;
border: none;
display: block !important;

}

Rounded corners with images

8. Multiple class name
<img src="image.gif" class="class1 class2" alt="" />

.class1 { border:2px solid #666; }
.class2 {

padding:2px;
background:#ff0;
}
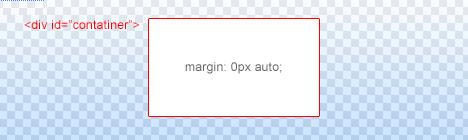
9. Center horizontally
<div id="container"></div>

#container {
margin:0px auto;
}

Center horizontally

10. CSS Drop Caps
<p class="introduction">
This paragraph has the class "introduction".
If your browser supports the pseudo-class
"first-letter"
, the first letter will be
a drop-cap.

p.introduction:first-letter {
font-size : 300%;

font-weight : bold;
float : left;
width : 1em;
}

CSS Drop Caps

11. Prevent line breaks in links, oversized content to brake
a{
white-space:nowrap;
}
#main{
overflow:hidden;
}
12. Show firefox scrollbar, remove textarea scrollbar in IE
html{
overflow:-moz-scrollbars-vertical;
}
textarea{
overflow:auto;
}

23 March 2009

Most best css hacks

If you are front end coder you must know how important is to make cross browses, valid CSS and xHTML code. And also you must know how much time we are spending in all those hacks and fixes for various browsers.

Here is the list picked CSS hacks and tricks which can help you in your CSS code and also save some time.

Min-Height
selector {
min-height:500px;
height:auto; !important
height:500px;

}
autoclear
.container:after {
content: ".";
display: block;
height: 0;
clear: both;
visibility: hidden;

}
.container {display: inline-table;}
/* Hides from IE-mac \*/
* html .container {height: 1%;}

.container {display: block;}
/* End hide from IE-mac */
Reset CSS
html, body, div, span, applet, object, iframe,
h1, h2, h3, h4, h5, h6, p, blockquote, pre, a, abbr,
acronym, address, big, cite, code, del, dfn, em,
font, img, ins, kbd, q, s, samp, small, strike, strong,
sub, sup, tt, var, dl, dt, dd, ol, ul, li, fieldset,
form, label, legend, table, caption, tbody, tfoot,
thead, tr, th, td {

border:0pt none;
font-family:inherit;
font-size:100%;
font-style:inherit;
font-weight:inherit;
margin:0pt;
outline-color:invert;
outline-style:none;
outline-width:0pt;
padding:0pt;
vertical-align:baseline;

}
table {
border-collapse:separate;
border-spacing:0pt;
}
caption, th, td {

font-weight:normal;
text-align:left;
}
blockquote:before, blockquote:after, q:before, q:after {

content:"";
}
blockquote, q {
quotes:"" "";

}
strong {
font-weight:bold;
}
em {
font-style:italic;

}
* {
margin:0pt;
padding:0pt;
}
Scrolling Render IE
html {
background : url(null) fixed no-repeat;

}
Opacity
#transdiv {
filter:alpha(opacity=75);
-moz-opacity:.75;
opacity:.75;}
PRE Tag
pre {
white-space: pre-wrap; /* css-3 */
white-space: -moz-pre-wrap !important; /* Mozilla, since 1999 */

white-space: -pre-wrap; /* Opera 4-6 */
white-space: -o-pre-wrap; /* Opera 7 */
word-wrap: break-word; /* Internet Explorer 5.5+ */
}
Li Background Repeat IE
<!--[if lt IE 7]>
<style>
#leftnav li { zoom: 1;} /* haslayout=true */

</style>

<![endif]-->
Good to know
@charset "UTF-8";

/* ---------------------------
WinIE7
------------------------------ */


*:first-child+html selector{property:value;}

/* ---------------------------
WinIE6 & Mac IE
------------------------------ */

* html selector{property:value;}


/* ---------------------------
WinIE6
------------------------------ */

/*\*/
* html selector{property:value;}
/**/

/* ---------------------------
MacIE
------------------------------ */


/*\*//*/
selector{property:value;}
/**/


SEO basics

Search engine optimization (SEO) is the process of improving the volume and quality of traffic to a web site from search engines via "natural" ("organic" or "algorithmic") search results for targeted keywords. In this article find out how to do basic SEO, code search engine friendly pages and how to do a basic promotion of your site.

For this I will use one of sites I've made, it is AdSense site and it follows SEO rules and it is good example what to do and what not to do. This site is http://www.aboutdoghealth.org/ so let's start from the top.

Things to do
  • Keywords in URL
    For example http://www.aboutdoghealth.org/ use whole words รข€“ keywords to best describe your site. Don't rely on this if you don't have keywords in other parts of your site.
  • Keywords in <title> tag
    This shows search results as your page title, so this is one of the most important things and it shouldn't be long 5-6 words max, and use keyword at the beginning.
  • Keywords in anchor texts
    Also very important, especially for the anchor text, because if you have the keyword in the anchor text in a link from another site, this is regarded as getting a vote from this site not only about your site in general, but about the keyword in particular.
  • Keywords in headings (<H1>, <H2>, etc. tags)
    One more place where keywords count a lot. But beware that your page has actual text about the particular keyword.
  • Keywords in the beginning of a document
    While coding your page put your main content before side bar. Because this also counts, though not as much as anchor text, title tag or headings
  • Keywords in <alt> tags
    Spiders don't read images but they do read their textual descriptions in the <alt> tag, so if you have images on your page, fill in the <alt> tag with some keywords about them.
  • Anchor text of inbound links
    This is one of the most important factors for good rankings. It is best if you have a keyword in the anchor text but even if you don't, it is still OK.
  • Origin of inbound links
    It is important if the site that links to you is a reputable one or not. Generally sites with greater Google PR are considered reputable and the .edu and .gov sites are the most reputable
  • Links from similar sites
    Having links from similar sites is very, very useful. It indicates that the competition is voting for you and you are popular within your topical community.
  • Metatags
    Metatags are becoming less and less important but if there are metatags that still matter, these are the <description> and <keywords> ones.
  • Unique content
    Having more content (relevant content, which is different from the content on other sites both in wording and topics) is a real boost for your site's rankings.
  • Frequency of content change
    Frequent changes are favored. It is great when you constantly add new content but it is not so great when you only make small updates to existing content.
  • Site Accessibility
    Another fundamental issue, which that is often neglected. If the site (or separate pages) is unaccessible because of broken links, 404 errors, password-protected areas and other similar reasons, then the site simply can't be indexed.
  • Sitemap
    It is great to have a complete and up-to-date sitemap, spiders love it, no matter if it is a plain old HTML sitemap or the special Google sitemap format.
Things not to do
  • Keyword stuffing
    Any artificially inflated keyword density (10% and over) is keyword stuffing and you risk getting banned from search engines.
  • Keyword dilution
    When you are optimizing for an excessive amount of keywords, especially unrelated ones, this will affect the performance of all your keywords and even the major ones will be lost (diluted) in the text.
  • Single pixel links
    when you have a link that is a pixel or so wide it is invisible for humans, so nobody will click on it and it is obvious that this link is an attempt to manipulate search engines.
  • Cross-linking
    Crosslinking occurs when site A links to site B, site B links to site C and site C links back to site A
  • Duplicate content
    When you have the same content on several pages on the site, this will not make your site look larger because the duplicate content penalty kicks in. To a lesser degree duplicate content applies to pages that reside on other sites but obviously these cases are not always banned
  • Doorway pages
    Creating pages that aim to trick spiders that your site is a highly-relevant one when it is not, is another way to get the kick from search engines.
  • Cloaking
    Cloaking is another illegal technique, which partially involves content separation because spiders see one page (highly-optimized, of course), and everybody else is presented with another version of the same page.
  • Invisible text
    This is a black hat SEO practice and when spiders discover that you have text specially for them but not for humans, don't be surprised by the penalty.
  • Illegal Content
    Using other people's copyrighted content without their permission or using content that promotes legal violations can get you kicked out of search engines.
  • Flash
    Spiders don't index the content of Flash movies, so if you use Flash on your site, don't forget to give it an alternative textual description. And also don't have just flash home page without HTML one.
  • Frames
    Frames are very bad for SEO. Avoid using them unless really necessary.
  • Redirects (301 and 302)
    When not applied properly, redirects can hurt a lot - the target page might not open, or worse - a redirect can be regarded as a black hat technique, when the visitor is immediately taken to a different page.
  • Bans in robots.txt
    If indexing of a considerable portion of the site is banned, this is likely to affect the nonbanned part as well because spiders will come less frequently to a "noindex" site.
  • Session IDs
    This is even worse than dynamic URLs. Don't use session IDs for information that you'd like to be indexed by spiders.
Submit your site

Tukeran Link

Halo Semua bloggers akhirnya daku tergoda juga untuk melakukan tukeran link. Bagi yang berniat silahkan komentari post ini untuk merequest b...